Indian Visa Instruction
Traveling to India is now convenient, hassle-free and affordable, thanks to the Government of India efforts and milestones in the last about 5 years. While it is true that the government has done a lot, you have a pivotal role to play to enjoy the e-visa services as a foreigner. What you will need to do is to apply for the visa within the guidelines and instructions laid out by the government. That is why we have laid down essential instructions and information that you need to know to benefit maximally.
10 Indian E-Visa Instructions
- You may apply for the Indian electronic visa under five categories namely:
- India e-Tourist Visa
- India e-Business visa
- India e-Medical Visa
- India e-Medical attendant visa
- India e-Conference Visa
As a foreigner, you will need to specify which e-visa category you are applying for.
- Emergency Visa to India application can be made as early as 120 days before the day of arrival and a minimum of 4 days from the expected day of arrival in India.
- For the e-medical visa, you are allowed three entries in a year and the e-business and e-tourist visa you are allowed two entries in one year. The validity for an e-medical visa is 60 days while the validity for e-business and e-tourist visa as from March 2019 was extended from 60 to 365 days.
- When filling the online form, you will be asked to upload a copy of a recent passport-sized photograph of your own taken by a digital camera and not more than 6 months old. It should be taken on a white background and the appearance of your face should be clear. Further, you will need to upload a scanned copy of your passport that shows your details clearly like your name, expiry date, and nationality. Your passport should have two blank pages as well. The copy of your photograph and passport should not exceed 4MB each in size. Bigger files will be rejected by the system and unclear copies may result in rejection of your application
- It is possible to track the progress of your e-visa online.
- You will receive your electronic travel authorization via your email address within the 5 days/3 days. Once you receive travel authorization approval, you should print it and carry it along with your passport to the airport.
- Electronic visa charges are territory or country specific. About 2.5% will be charged above the e-visa processing fees. To have a successful application, you should pay the fees at least four days before your expected travel date. If you delay in payment, your application processing will also be delayed. You can make your payments through your PayPal account, credit card or even your debit card – whichever you prefer.
- The fees paid are non-refundable even if your visa is rejected – a greater reason to follow all the instructions keenly to avoid rejection. They are non-refundable because the visa was processed whether it was approved or rejected.
- Once the visa is given, it is not extendable, or extendible and it is invalid when it comes to visiting restricted/protected and cantonment areas. Extending your stay beyond the stipulated in the visa will attract penalties of up to $500.
- There are 28 designated entry airports that you use and 5 seaports. The list is available. However, to exit India you may use any authorized immigration check posts.
Find complete list of Authorized Immigration Check Ports.
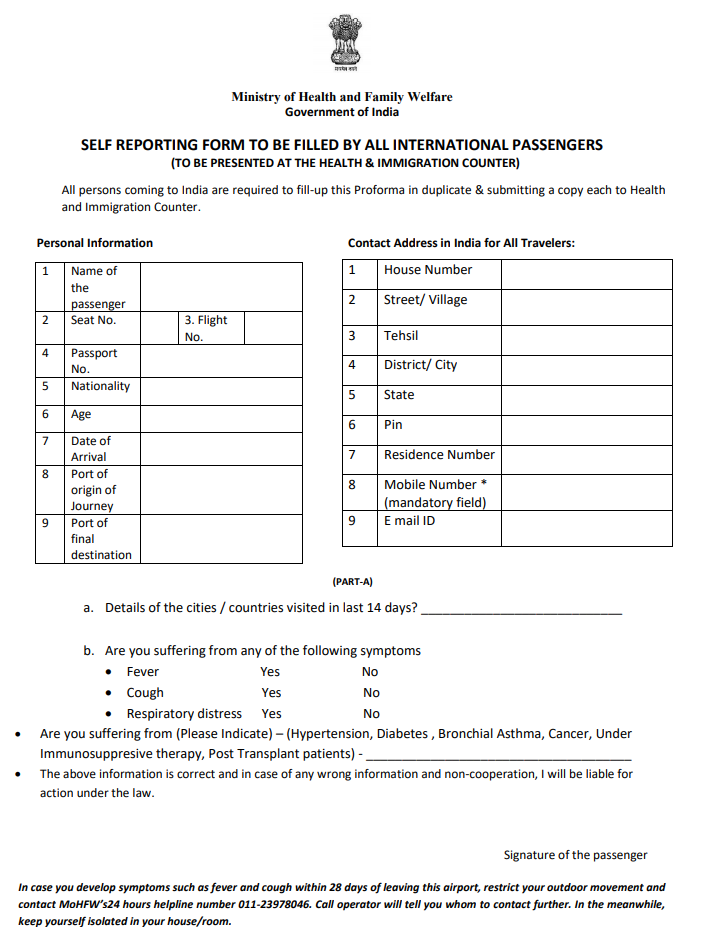
Self Declaration Form for all International Passengers:
The advisory issued by the Ministry of Health and Family Welfare has made it mandatory for the passengers to furnish duly-filled self-declaration form to health officials and immigration officials, and undergo universal health screening at the designated health counters at all points of entry.

Self declaration form to be filled by all international passengers & carry with you while traveler. This will help make the journey of passengers more convenient and comfortable in a contactless manner, as they do not have to fill physical copies of the forms on arrival. You can download the form as here self declaration form